
Bone broth is not only comforting, but so nutritional. It brings great flavor when added to soups. It is also enjoyable to just sit and sip on cozy evenings.
Click to save this Pin for later!
Some links are affiliate links, which means I might make a small commission at no extra cost to you. As an Amazon Associate, I earn from qualifying purchases.
When I was really little, I often times got chicken noodle soup when I was sick.
On rare occasions, when I was really sick, I remember my mom getting me mums with chicken noodle soup as she would sit with me and stroke my hair.
There was nothing more loving to me during those times that I didn’t feel well.
The broth always warmed my body and the flowers and her presence brightened my dreary disposition.
In Korean cuisine, meals are traditionally served with a warm broth.
Shortly after moving to Korea, I became friends with a local family and they invited my family over for a traditional Korean meal. I brought up that I like how Korean meals are served with so many veggies and broth.
My friend responded that the broth helps to wake up the stomach! How lovely to wake up your digestion with a warm nutritious drink.

Read our personal story about how we reversed tooth decay!
Learning about bone broth
When I was learning about all the health benefits of broth, I found that bone broth specifically had so much nutritional value.
I knew I needed to learn how to make it for my family. Especially because the cost in the stores was so high.
I wanted to offer my kids a warm cup when they had a cold or during a meal to help wake up their tummies!
My ambition to create bone broth came to a screeching halt when I learned that it had to slow cook on a stove top for 24 hours or more…
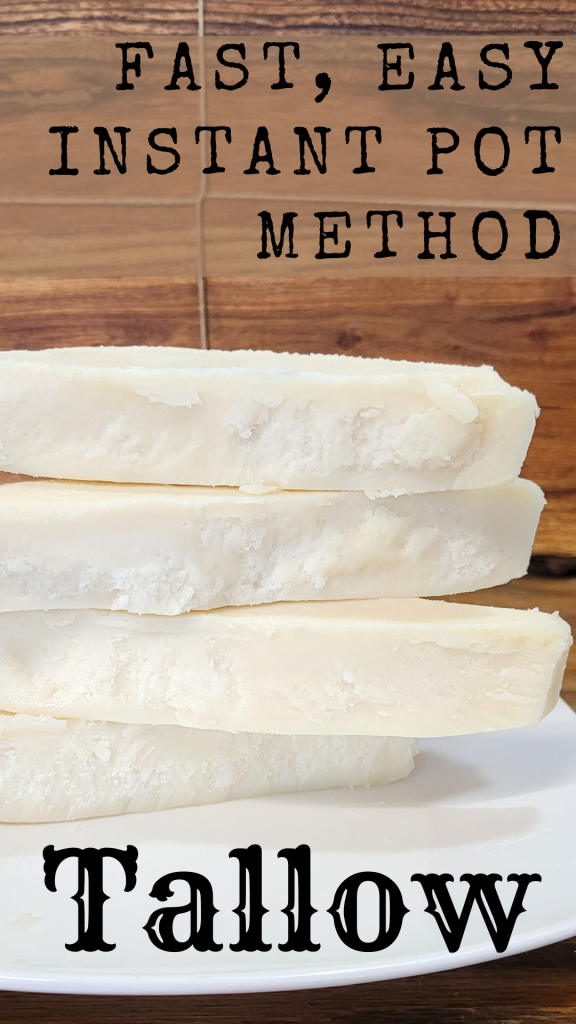
Then I found my solution my most loved and used kitchen tool – the instant pot!
Wow, what a time saver, especially for busy moms.
I bought it while living in Korea. When it arrived, I was terrified to use it. It sat in the box for 5 months before I built up the courage to use it!
What is in bone broth?
Cooking bones for an extended period of time, with the help of apple cider vinegar, helps pull out the bone marrow from within the bones.
It basically breaks down the connective tissues and protein from the bones and infiltrates the water.
This step to making bone broth is important, because the animal’s bone marrow provides more nutrients than the meat.1 In some studies, there was a correlation showing that longer cook times increased the amount of calcium and magnesium in the bone broth.1
So the longer the bones cooked the more infused the broth becomes with a higher mineral content.
What are the health benefits of bone broth?
- Minerals and components within bone broth are important for cellular function. They aid in the remineralization of our own skeletal system, especially as we age. Not only is this important as we age, but also as we are developing.
- Collagen is a component of bone broth. Collagen is connective, therefore, it helps strengthen your hair, nails, skin, tissues, and pelvic floor.
- Collagen aids in the proper growth and development of a baby while in utero and as a young child growing and developing.
- Another health benefit of bone broth is that it stimulates the immune and protective response in our body to fight against foreign material!1 How cool is that – it is literally fuel for our immune system’s response.
- Bone broth contains gelatin which helps repair the gut lining. In some cases this can help those with food sensitivities related to leaky gut.
- Bone broth contains potassium and glycine which aid the liver in detoxification.
- Bone broth contains arginine, glycine, and glutamine which promote a well functioning metabolism.

I am just touching the surface of the benefits and components of bone broth.
Over at the Weston Price Foundation website, there is a great article detailing more than you could care to know about bone broth.
However, if you’re like me, then click here to read more fascinating, but lengthy material on this subject. Otherwise let’s get on with it and learn how to make this nutrient packed super food.
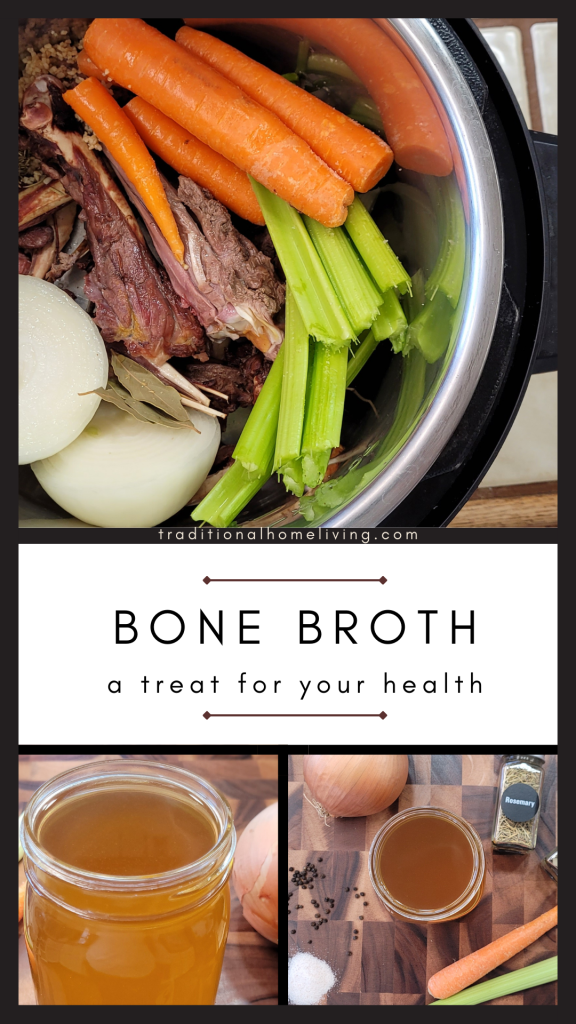
How to make bone broth
Equipment
Instant Pot: for convenience of time, I use an instant pot and recommend you do too.
Here is a link to the instant pot I bought years ago. I use mine for at least 3-4 times a week. I like this specific model because our family has grown into it. When we bought it we were a family of three. Now we are a family of six, it fits our needs and will continue to as the kids get older.
It is a bit of an investment, but taking care of it will ensure it’s longevity and in return save time in the kitchen!
I share many of my favorite recipes using this favorite kitchen tool on this website.
Mesh Strainer: I love these mesh strainers since they are multi-functional in my kitchen, such as when making Kombucha.
Mason Jars to store your extra bone broth in.
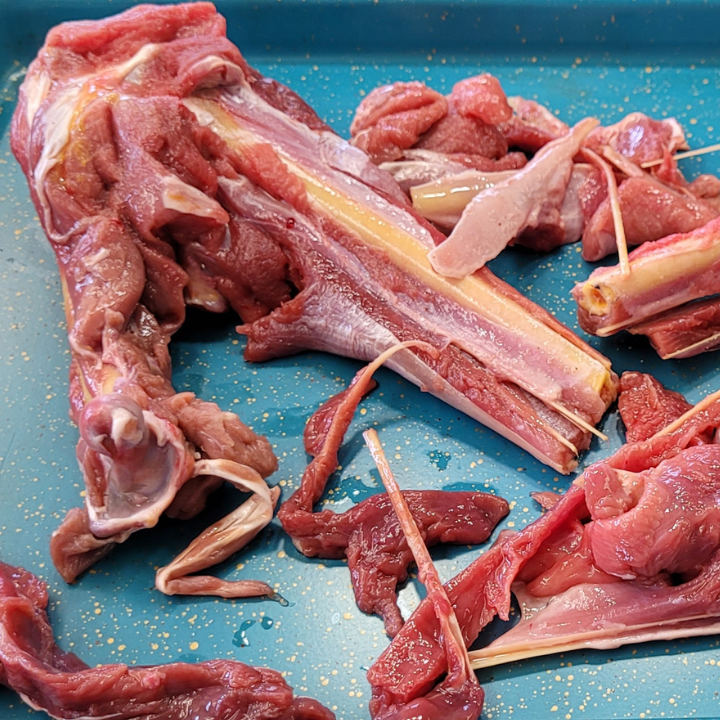
Preparing the bones
You can use any animal bones you have. In the past I have made bone broth using, chicken bones, beef bones, elk bones, deer bones, and turkey bones.
First you must cook your bones if they are raw.

Pictured above are the turkey bones I used from this Fried Turkey Thigh recipe.
TIP: If your bones are raw, like mine were, this is a crucial step for your bone broth to turn out tasting good.
Let me explain why.
When my husband killed the Elk in Colorado, we had a lot of bones. I didn’t want to just toss them so I had him cut them to size for our instant pot and got to work.
Well, after all my efforts, the broth tasted absolutely disgusting.
I had forgotten to roast them first and the flavor reflected that.
So don’t make my mistake if you are working with raw bones, take this extra 30 minutes so that it will be enjoyable.
- Turn your oven to 450℉
- Place the bones on a cookie sheet pan or a roasting pan. Try not to overlay them.
- Roast for 30 minutes
Working with the instant pot
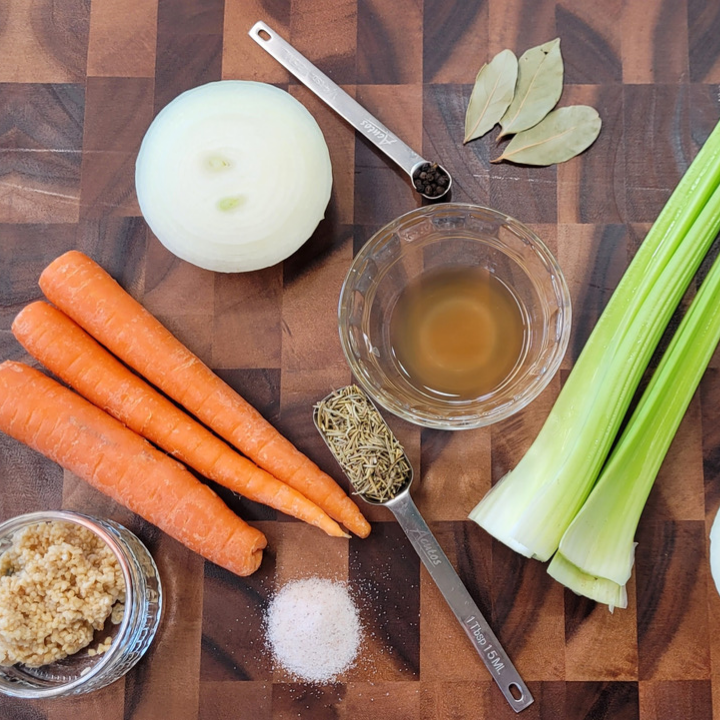
- While the bones are roasting you can clean and cut the veggies and measure out the ingredients.
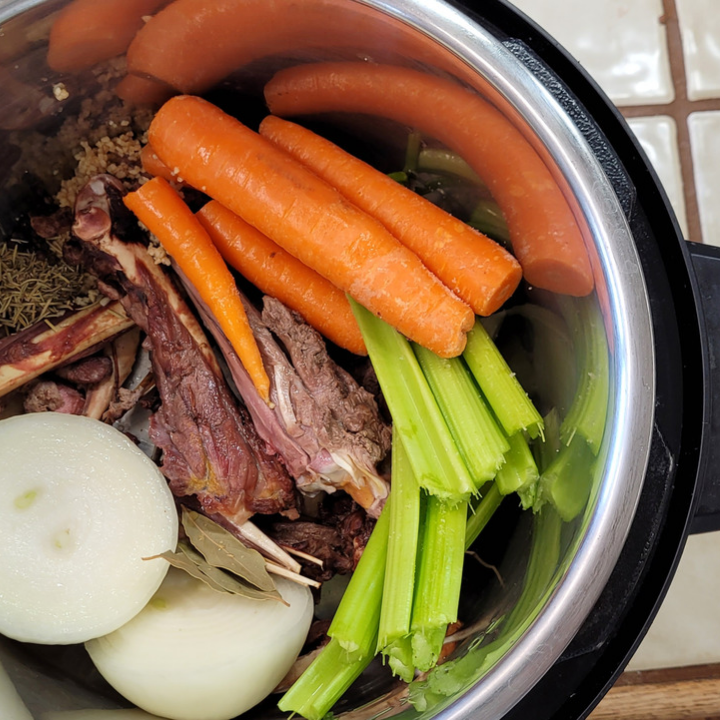
- Once the bones are done and cool enough to handle, move everything into the instant pot.

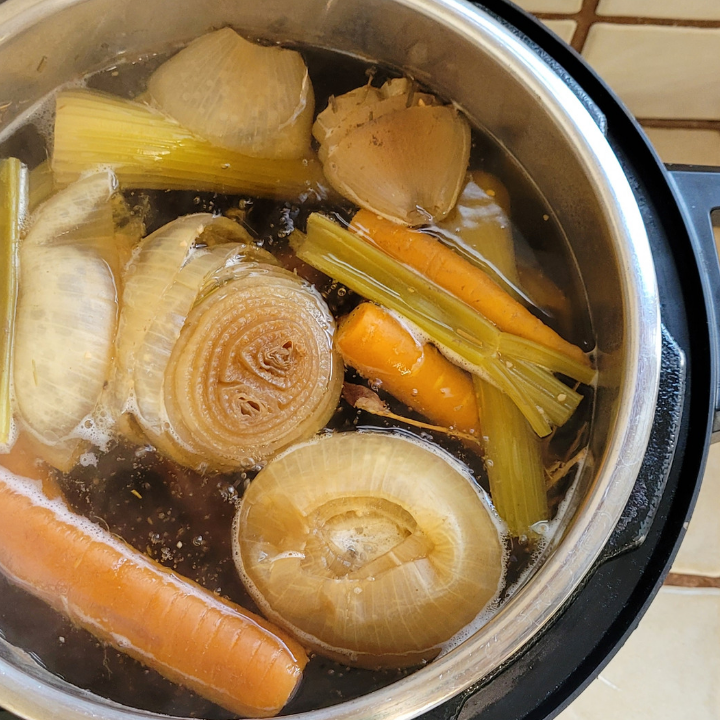
- Fill the water line to the max fill line. In my size of instant pot I was able to pour 22 cups of water in. More or less is fine, just don’t go past your instant pot’s max fill line.
- Place the lid on the instant pot, slide into the lock position, and flip the valve on top to “sealing”.
- I like to select “manual” to control the setting for this recipe.
- Set to high pressure and adjust the time to 4 hours.
- Building up pressure will take time. Once it is pressurized, leave it alone and don’t bump or move it.
- It will then cook for 4 hours after it comes to pressure.
- Once the cook time is over, allow it to naturally release pressure on it’s own. This will take another hour. Again, avoid touching or moving the instant pot as it naturally releases the built up pressure.
- Once it has depressurized, I put on oven mitts and carefully strain the broth and store it in mason jars. Of course you can wait until it cools enough to handle.
Storing the bone broth
Refrigerator: You can keep bone broth in a sealed container for up to 5 days.
Freezer: If you freeze bone broth it will keep 4-6 months. Consider freezing in silicone cups or ice cube trays, then moving into a zip lock bag once frozen solid.
Canning: This method keeps the longest.
How to use bone broth
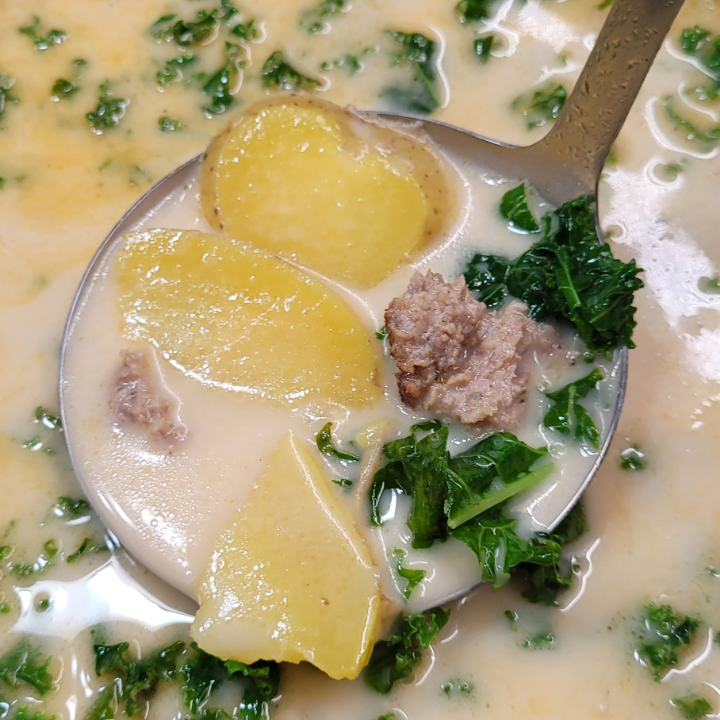
My family’s favorite method is to just drink it from a mug with a little pinch of salt. I also use it as a base for soups, when cooking rice, in sauces, and in casseroles.
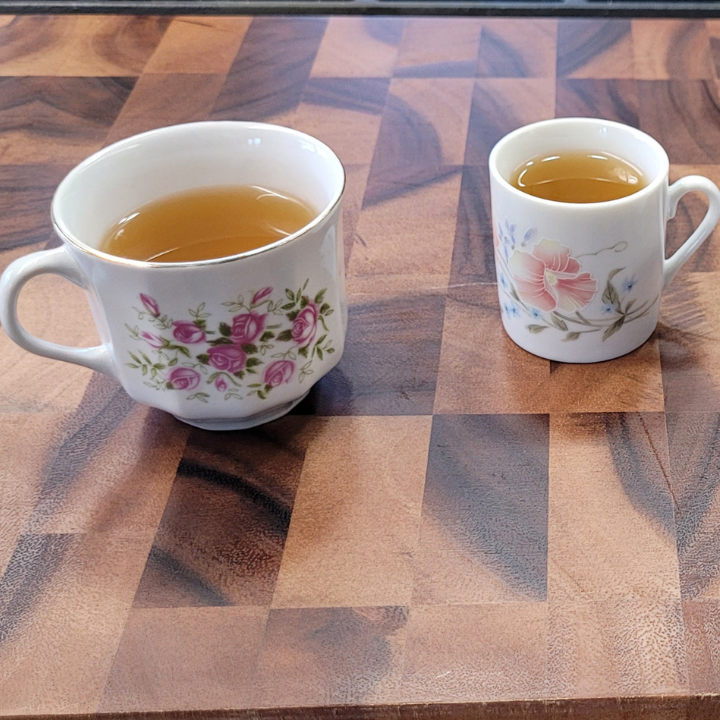
These were my two oldest kid’s teacups for bone broth. I filled them up four times each. They love this healthy drink!
Tell me in the comments below if your family likes bone broth too!
For he satisfieth the longing soul, and filleth the hungry soul with goodness.
Psalm 107:9

Bone Broth Your Kids Will Love
Equipment
- 1 Pressure Cooker
- 1 Mesh Strainer
- Mason jars or airtight containers
Ingredients
Ingredients
- 3-4 lbs Roasted bones (any animal)
- 3 Carrots
- 3-4 Celery
- 1 Onion
- 5-6 Garlic Cloves
Herbs and Spices
- 2-3 Bay leave
- 1 tbsp Rosemary
- ¼ tsp Whole Peppercorns
- 1 tbsp Apple Cider Vinegar (with the mother)
- Salt to taste
Instructions
- If the bones are raw, this step is crucial for the bone broth to taste good. Roast 3-4 lbs Roasted bones in the oven for 30 minutes at 450℉. If your bones have already been cooked, you can skip this step.
- While the bones are roasting clean and rinse your vegetables.
- Chop the ends of the carrots and celery.
- Cut onion in half.
- Crush garlic.
- Once the bones are done cooking, place them in your instant pot. They will be very hot so you can wait to move them until they have cooled off.
- Add all your remaining ingredients to the instant pot. 3 Carrots, 3-4 Celery, 1 Onion, 5-6 Garlic Cloves, 2-3 Bay leave, 1 tbsp Rosemary, ¼ tsp Whole Peppercorns, 1 tbsp Apple Cider Vinegar, and Salt to taste.
- Add water to the max fill line, don't go past your instant pot's max fill line.
- Place the lid on the instant pot, slide into the lock position, and flip the valve on top to "sealing".
- Select "manual" and set to high pressure, adjust the time to 4 hours.
- It takes about an hour to become pressurized. Allow it to then cook for 4 hours.
- Once the cook time is over, allow it to naturally release pressure on it's own. This will take another hour.
- Once it has depressurized carefully strain the broth. Store it in mason jars or air tight containers. It will be incredibly hot so go about this carefully if you choose to strain it immediately.
- Serving with a little pinch of salt and enjoy!
Notes
 - IMAGE, 900x600, SEAL and Bottle, Detox Project")
Readers of Traditional Home Living receive 10% off all products when using discount code THL10 at perfectsupplements.com Thank you for being here!
Looking for more inspiration to use the whole animal? Try these other great recipes!

Looking for how to use your bone broth in recipes? Check out these favorite soups!


References
- Mar-Solís, L.M.; Soto-Domínguez, A.; Rodríguez-Tovar, L.E.; Rodríguez-Rocha, H.; García-García, A.; Aguirre-Arzola, V.E.; Zamora-Ávila, D.E.; Garza-Arredondo, A.J.; Castillo-Velázquez, U. Analysis of the Anti-Inflammatory Capacity of Bone Broth in a Murine Model of Ulcerative Colitis. Medicina 2021, 57, 1138. https://doi.org/10.3390/medicina57111138
Homemade bone broth is the best! How often do you have bones for your broth? I’m thinking of buying a whole chicken once or twice a week to always have bones on hand.
We fortunately acquire many of our bones from my husband hunting. However, times we don’t have them for free, then buying a chicken a week would provided enough bone broth for our needs in our family of 6!
Hi Ashley. Thank you for this awesome post. Now I know why the good Lord has me sucking on bones. But, this article was very informative. Thank you so much.
I am so glad you found it to be helpful and informative!